I recently had a trip to Bear Lake in Idaho planned and wanted to do some portable operation, so I decided to give the CrankIR a try. The heat in Texas becomes tiresome, so getting away from it further north is nice in the summer, and a great opportunity to experiment with different portable antennas. This year, it was CrankIR’s time. This review will cover my overall experience thus far with the antenna.
First impressions of the antenna build itself. It is a magnificent piece of engineering. I was impressed by the high-quality workmanship, top-notch materials used and the overall design of the antenna. In my case, I got the tripod as the mount. With the CrankIR, you get what you pay for. It came in around $1,100.00 including the tripod, along with an extra radial unit (that I accidentally ordered due to misunderstanding what was included in the base package on the CrankIR web page). The stainless steel wires should last a lifetime, especially for portable use.
My only complaint so far is the tensioning, or lack thereof, between the two spools on the radial unit. There’s not enough tension to keep the two spools bound together when you need them to act as a single unit. Other than that, the mechanical operation has been flawless.
Initial Setup and Testing Ahead of Portable Expedition
Initial setup and testing were performed in my backyard, using a YouKits FG-01A antenna analyzer for tuning.
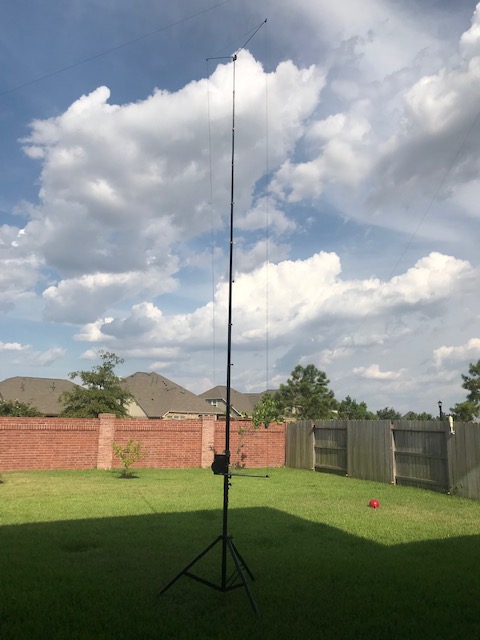
The above photo shows the CrankIR mounted atop the tripod. The vertical is configured into the 40-meter position, whereby it goes up, across the top spreader, then back down on the right side, forming an upside-down U shaped driven element. I wondered how well this 40-meter arrangement would actually work – more on that below.
Next, I connected the radial unit, which includes two spools similar to the main vertical spooling unit.
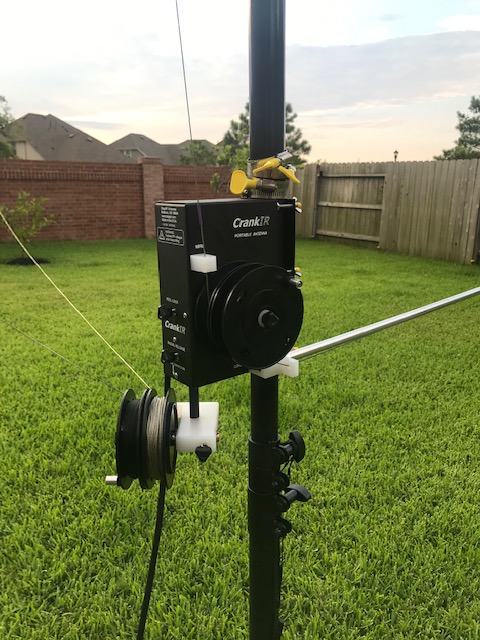
As seen above, the radial unit mounts underneath the main CrankIR unit. The radial unit’s copper mounting rod has a notch in it that helps maintain a solid hold on it when it gets tightened down into place. In this case, I ran the radial loop out and attached it to one of the brick pillars along the back fence. There are two plastic spools on the end of each radial wire and takeup line that allow for smooth adjustment of the radial wire length for tuning to each band.
This all worked perfectly as I tuned up both the driven (top) vertical element and the elevated radial (bottom) element for 20-meters initially. To my delight, by adjusting the driven element to its pre-established “green” shrink tube marker for 20-meters, then adjusting the radial to find the lowest point of resonance, I eventually landed at 1.2:1 VSWR.
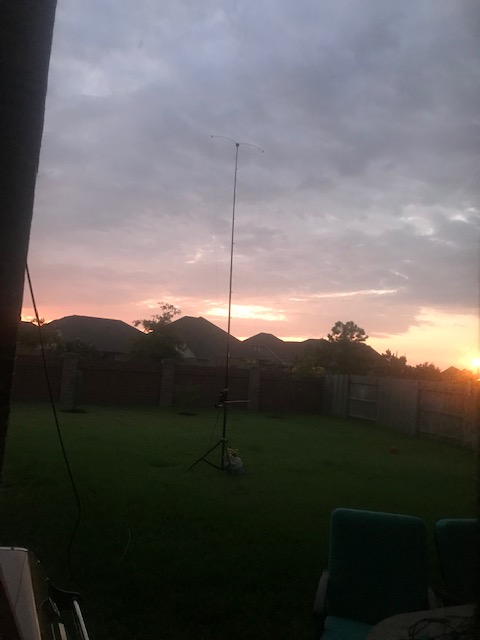
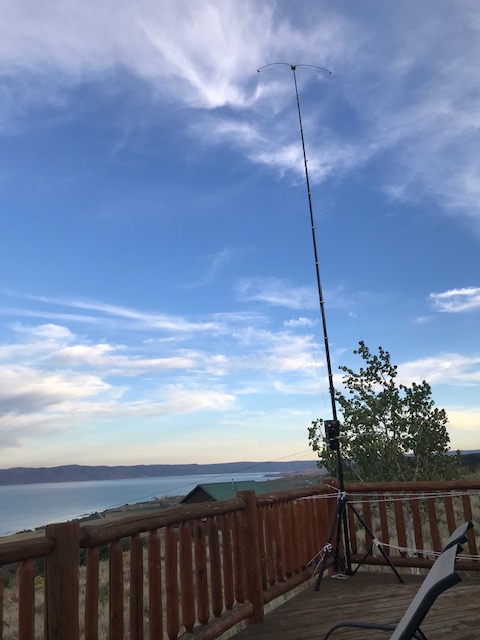
Now, I’m in an HOA neighborhood with the street right behind the brick fence, so I had no intentions of leaving the CrankIR up more than a day or so. This is a view around sunrise the next morning before I took the antenna down.
One thing I noticed when turning up for 40-meters was that there were two different points that looked like dips – only one of them actually resonated fully at 1.2:1 VSWR. I suspect the other was 5/8 wavelength but didn’t spend the time to further research. Always keep tuning to find the actual low SWR match point, which is there somewhere.
It took about 10 minutes to take the antenna down, pack it up in the nice nylon portable carry back it came with, and stuff the coax cable in there so I would be certain to have 50 feet of coax available for portable operation.
In terms of operation, I quickly established some FT8 contacts on both 20 and 40 meters, as shown in my QRZ.com log.
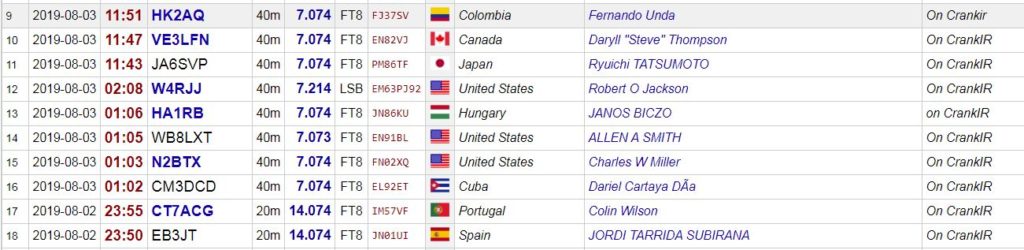
I was able to very quickly establish some DX contacts in Columbia, Canda, Japan, Hungary, Cuba, Portugal and Spain across 20 and 40 meters using less than 100 watts on my Flex 6300. Needless to say, with a single east-facing elevated radial, this seemed fairly impressive initial results.
Portable Operation at Bear Lake, ID
The site at Bear Lake is at a cabin up on a hillside, overlooking the lake to the east. I decided to place the tripod in a corner of the wood deck, and secure it to the wood railing using rope in case the wind picked up (which it did a day later).
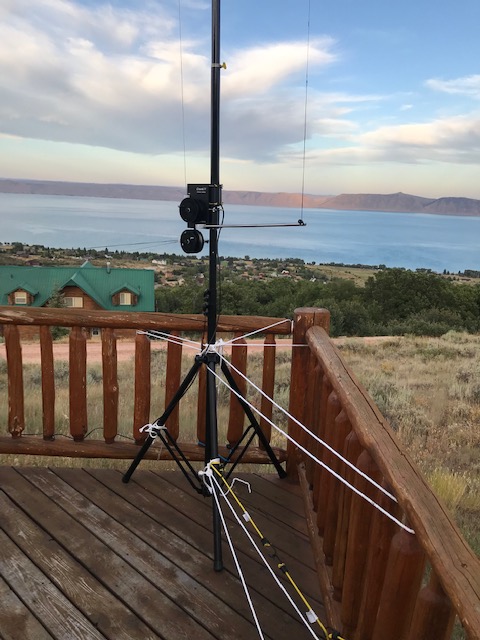
Since this was for portable operation, I quickly guyed the tripod at two levels using rope and a Bungie cord I had available. Might have been overkill but I didn’t want to chance to lose the antenna to a sudden wind event.
There weren’t any convenient trees or other structures available to connect the radial system to, so I improvised using a telescopic painter’s pole, jammed in between some rocks to keep it in place.
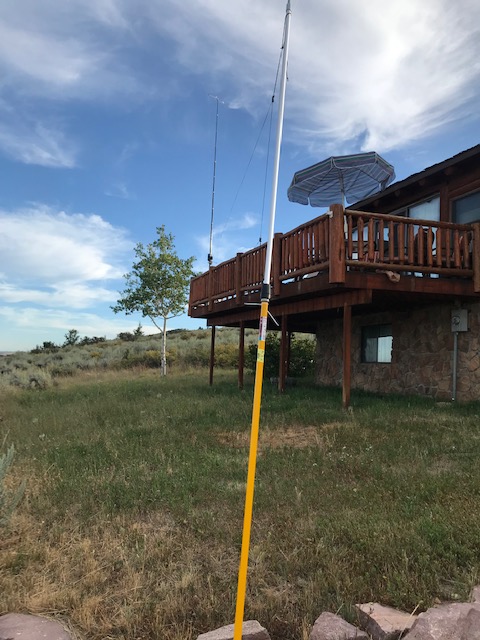
The painter’s pole was less than $20 at the local Ace hardware store and did the job just fine (I had used it the prior year to support a homebuilt inverted vee for 20-meters than evolved into a 20/40 fan dipole). The radial was facing northeast and was sloping downward, both of which were not ideal.
I believe the CrankIR worked much better when the tripod was at ground level and the radial was parallel to the ground (vs. slopping down the mountainside). Of course, this is a somewhat anecdotal observation, given my only other point of reference was the operation in my back yard.
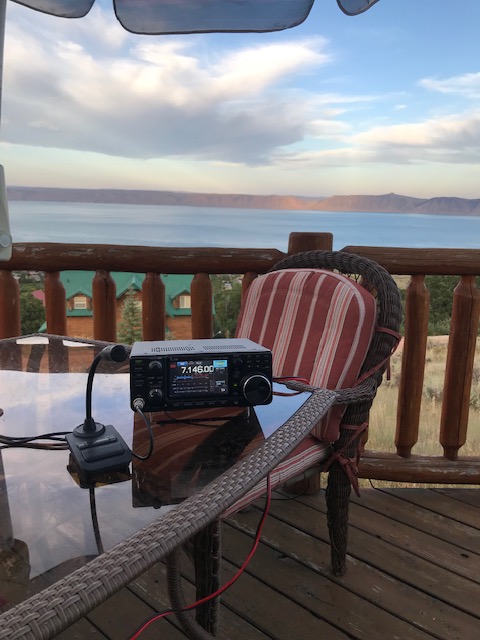
I brought my ICOM 7300 rig, along with a Surface Book Pro 4 with a USB cable and a 12 VDC power supply for portable operation. I primarily used FT8 operation once again for operating, along with some SSB.
I made a lot of FT8 contacts but did not log most of them into QRZ.com (just within the WSJT-X log). Overall, the portable operation was good but it seemed like propagation conditions weren’t quite as favorable as several weeks earlier (or perhaps the radial wasn’t as well-positioned – hard to be certain as there were many differences).

I didn’t log much to QRZ.com because the RF kept disrupting the DSL internet modem at the cabin, making it difficult to stay online. Still, I managed to log a few of the contacts anyway using the WiFi hotspot on my iPhone, as shown above.
I was able to connect with stations in Africa, across Europe, South America, Canada the US and Japan. Not bad, given the downward slope of the single radial facing northeast and the fact that I was located on a mountainside with another 1,000+ feet of the mountain behind me to the west.
Conclusions
So, my overall conclusions about the CrankIR based upon these two operating scenarios is that it’s a very impressive piece of kit. It shows the real power of operating at true resonance, one of the primary strengths of all SteppIR antennas. I was most impressed by the quality of the antenna itself, its design and attention to detail.
Some might suggest that the CrankIR is a “compromise antenna”. I might debate that point a bit, as my operating results surpassed my expectations. So far as I can see, the only points of compromise are:
- Single radial – the use of a single radial undoubtedly limits the antenna’s effectiveness as a vertical in all directions. However, moving the vertical to optimize for more than one target geo isn’t that hard, just takes a little time to manually adjust the radials
- Manual retuning – in today’s world where everyone seeks to maximize convenience, the CrankIR does require a nominal amount of effort to manually retune the antenna and radial for each band. Once you have the radial bands marked, by heating the supplied shrink tubes at resonance per band, it only takes a minute or less to retune.
For portable operation, neither of these is an inconvenience and in fact becomes just part of the portable operating experience, which in my view is just fine and perfectly acceptable. As this antenna doesn’t appear to be intended for permanent installation, this doesn’t seem like a limitation at all.
So, if you have $1,000 burning a hole in your pocket, are into portable operation or DX operation, I would highly recommend the CrankIR. Its naturally resonant operation and low takeoff angle work well together for DX. And should you be fortunate enough to be alongside some saltwater, well my bet is this is one of the best DXpedition antennas you could have with you.

RE: BatBeam
I wouldn’t jump to conclusions before you look at patent #5,865,390 called Variable Length Antenna Element. It appears SteppIR very closely follows that previous patent.
When I originally read SteppIR’s patents I was struck by several things. First what they don’t describe in their patent, second the cited reference patents seem rather random.
Additionally SteppIR’s main patent expires May 2021. RE42087 IIRC.
Alan