In addition to remote station operation, the next best thing is mobile operation, of course! As with every ham radio station, mobile comes with its own challenges. Here’s how I built mine and overcame the challenges that presented along the way.
The Rig
- Yaesu FT-857D covering 0.1-56, 76-108, 118-164 and 420-470 MHz (all in one radio)
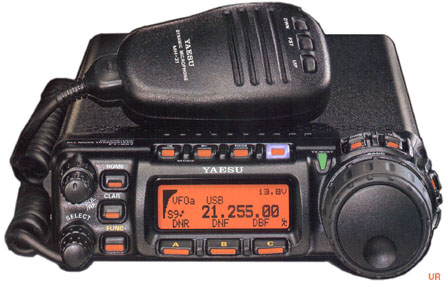
This little all-in-one rig is pretty amazing for the price. 160 – 2 meters, plus + 440 Mhz.
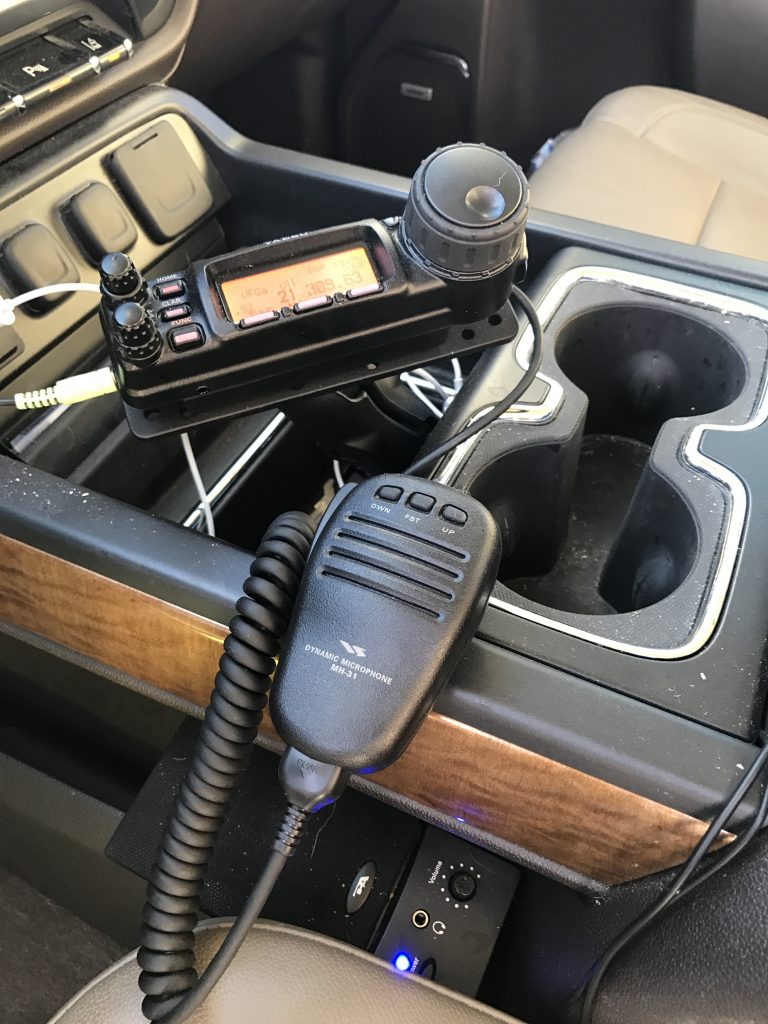
As you can see below, I mounted the faceplate on a swivel mount arm, and added an external USB powered speaker (with blue light on, between console and driver seat), so I can hear everything well when driving.
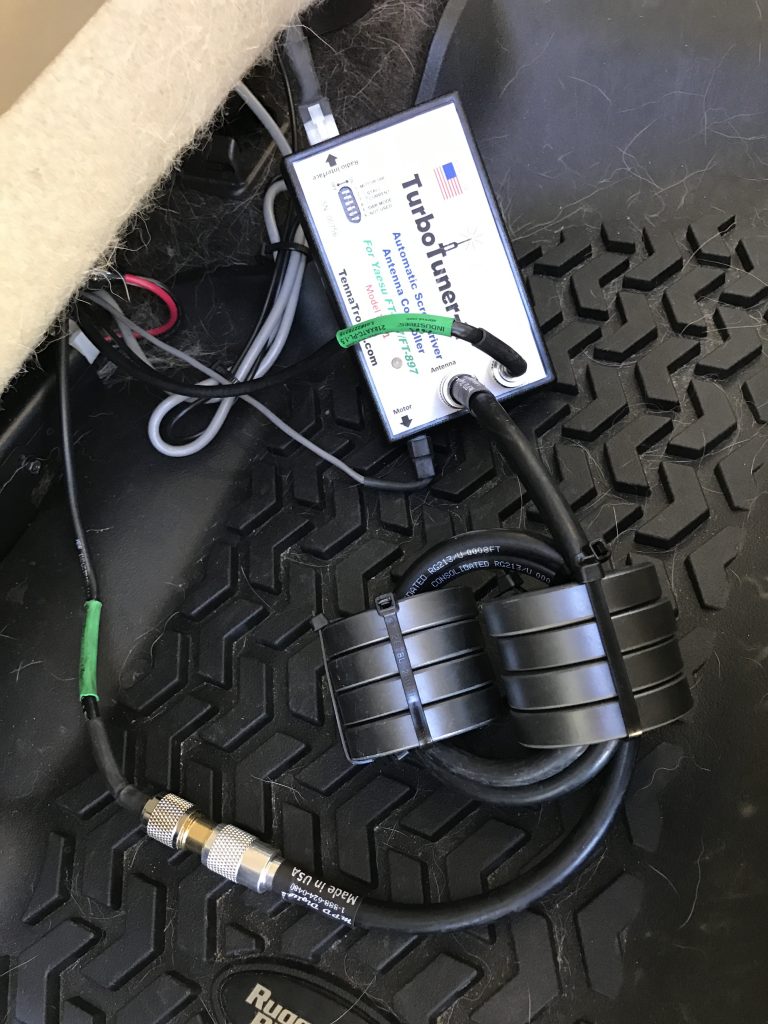
The Yaesu radio unit is mounted beneath the driver seat (you can see the edge of it and red power cord below), along with the tuner and home brew common mode coax choke, which I will discuss more later. These turned out to be the critical components to tune the screwdriver antenna from 80 to 6 meters without incident.
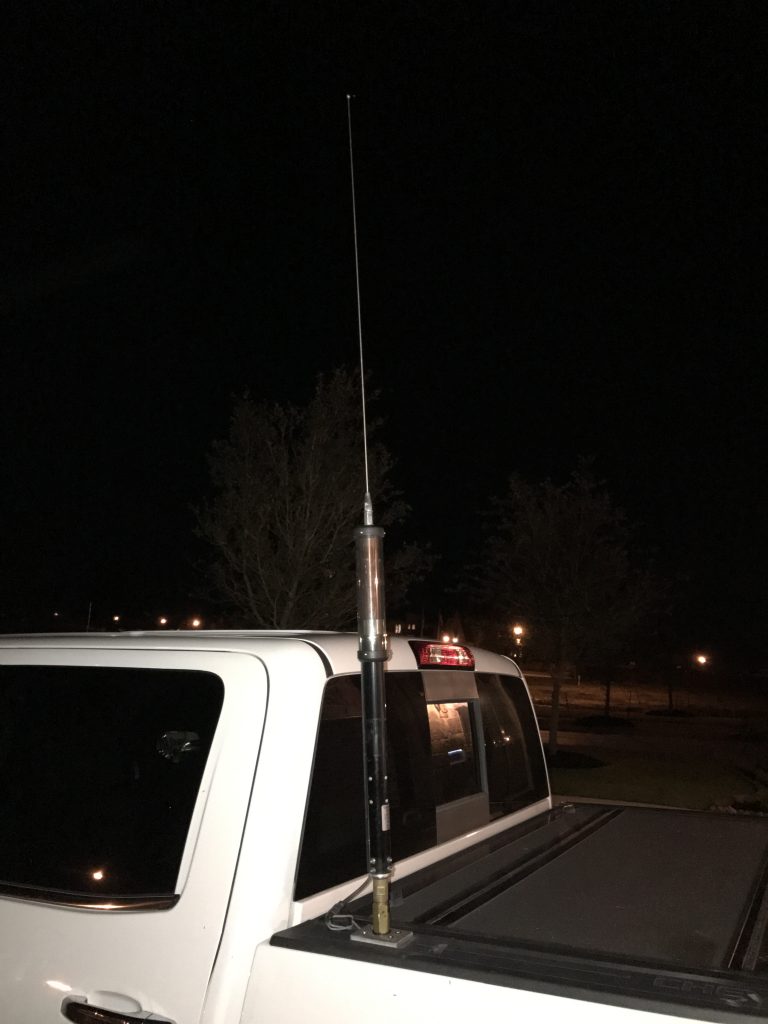
I chose the Little Tarheel II screwdriver antenna with 32″ whip (there’s a 54″ whip that adds more gain available). I chose this antenna because I wanted as full HF coverage as possible when operating remote (it doesn’t cover 160m). The whip height is manageable and doesn’t cause problems when going through most fast food joints.
As with most everything, there’s the good, the bad and the ugly (and they’re not always mutually exclusive).
I used a Breedlove quick-disconnect foldover post mount. I like this mount because it’s easy to remove the antenna to go through a car wash or fold it over before entering a parking garage.
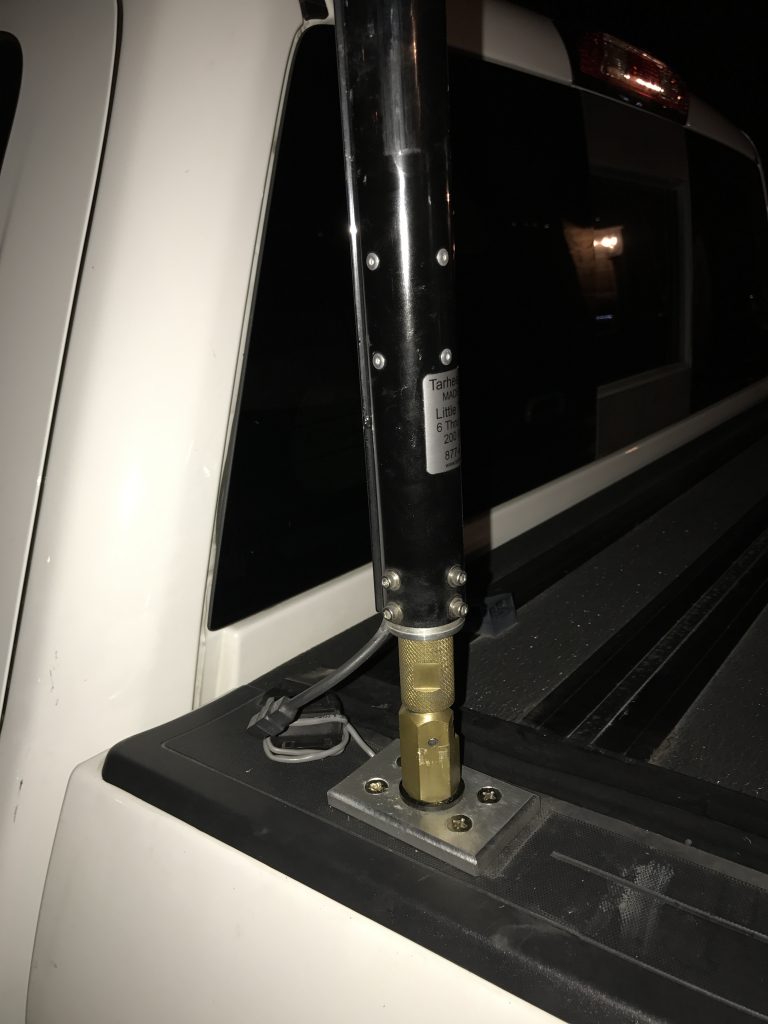
You’ll notice there’s a choke on the screwdriver control cable, to keep RF out of it. This is standard with the Little Tarheel II antenna.
Tuning Challenges
The first major issue I hit was antenna tuning challenges. It would tune on 80 and 40 meters, but no higher, which eliminated one of my key objectives, operating on 20 and 17 meters, as well (and 15 and 10 whenever they reopen someday).
I tried every imaginable combination of tuning power levels, tuner switch settings, screwdriver current and tuner modes – no dice. Everything pointed to the need for better grounds, so that’s where I focused next…
The Mobile Ground Radials
Like every good vertical antenna, one must have a corresponding “ground” or counterpoise. For mobile rigs, it’s the automobile itself. For my truck, it’s the bed, cabin and frame (and eventually the exhaust pipes).
Below is an image from underneath the truck bed and antenna looking up. You can see several grounding straps, in addition to the antenna secondary ground wire with the yellow plastic connector. The wide strap on the upper left connects the truck bed to the body frame. The lower right strap connects the bed to the cabin. These provide low-impedance RF ground paths which complement the vertical antenna.
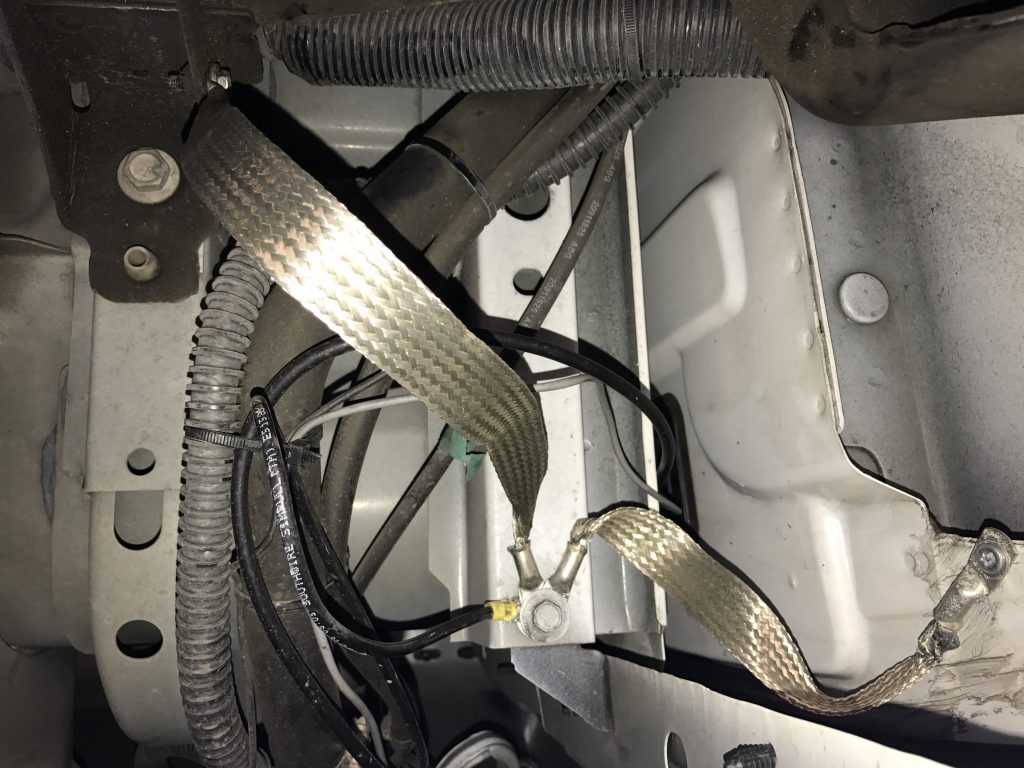
I still have more ground straps I want to install, connecting the exhaust pipes and mufflers to create and even bigger ground plane.
After getting this level of grounding in place, my noise floor when the engine and all electronics running dropped from S7 to S8 to around S3 – a usable level.
Common Mode Current Choking
Even after all that grounding work, I could only get reliable tuning on 80 and 40 meters. At first I was stumped, but then I noticed some different behavior when tuning at 10 watts vs. 100 watts – very different. This clued me into the fact that, of course! There had to be common mode currents, and loads of CMC when the screwdriver antenna is still trying to reach resonance.
So I went inside the shack and temporarily borrowed two common mode chokes I use to keep RF out of the house and GFCI breakers, shown below.
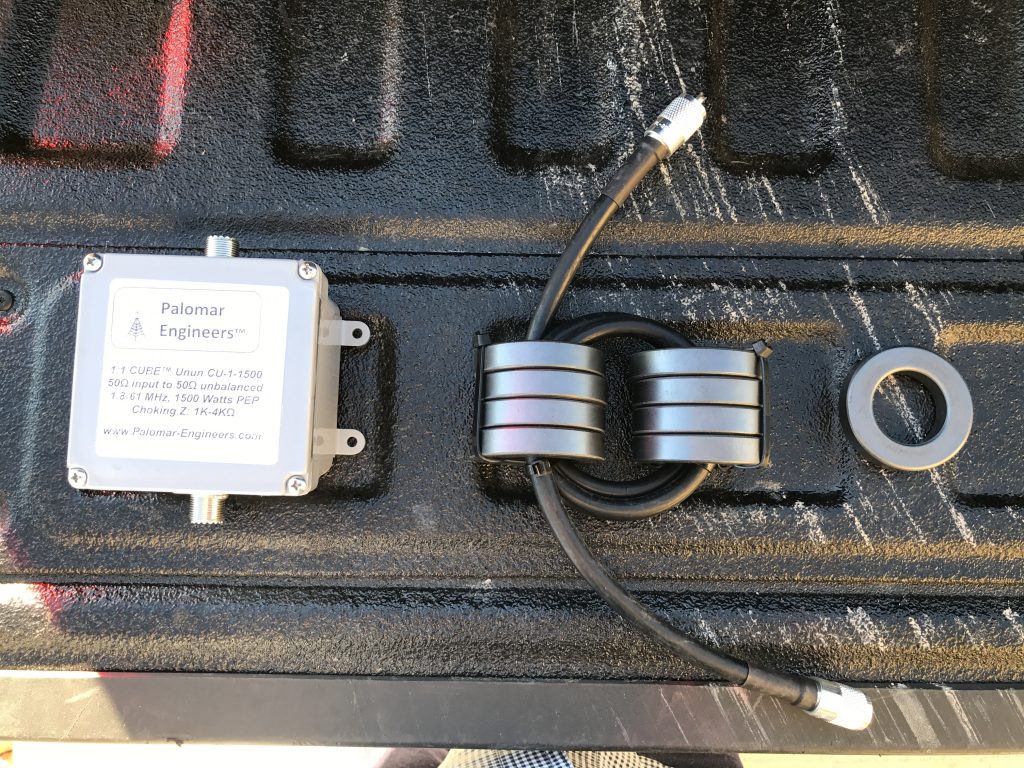
On the left, is a Palomar Engineers 1:1 CUBE Unum choke. In the middle, is a homebrew inline coax choke I learned about here from W1HIS. In my home station, I actually use both of these chokes in series to eliminate common mode currents. For the mobile rig and auto electronics, which aren’t as sensitive as modern GFCI circuit breakers and capacitance touch switches (another story), I only need one of these chokes. So I chose the homebrew inline choke.
Turns out that CMC was driving the radio and/or auto-tuner nuts on the higher frequency bands, preventing completion of automatic tuning operation. Once the CMC choke was installed, all bands tune up perfectly.
This was preventable. The TurboTuner 2 instruction manual makes mention that an antenna choke is required, but I must have skimmed past that during my original installation. Bottom line: ALWAYS have a CMC choke on your antennas and avoid most ugly RF in the shack and other forlon places.
Best of all, my noise floor with the truck running is now S0 to S1. I could not believe how quiet this rig became with the combination of additional grounds and CMC. I had read all about this many times – all I can say is “IT’s TRUE!”
HAPPY DAYS
Now my mobile rig works exactly like it’s supposed to according to all those many reviews I read about each of these products before I purchased them. Lessons learned around proper mobile ground and CMC choking (once again).
My first quick test QSO was with a station in Cuba – using only 20 watts, and I got a 56 signal report from my driveway. Needless to say, I’m very happy how this has worked out!
UPDATE 7-28-2019
Received an inquiry about how the Yaesu head is mounted. I used a swivel mount, as shown below, and screwed the base of the swivel mount into the rear side of the console cavity.
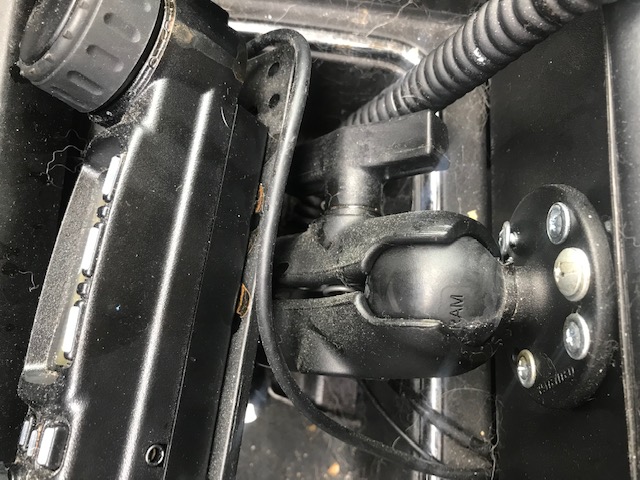
Mobile radio head on swivel mount in Chevy truck

Great job!I’ve struggled with the same problem. Thank you for the great info. I bonded everything but still have noise. Choke time!
Yeah, the choke made a huge difference. Wish I would’ve designed it in from the start. The CMC choke is a must-have on any antenna that uses a tuner, as common mode currents will run high due to the mismatches.
It’s so nice not having all that receive noise to contend with. I am a bit surprised that it works as well as it does on the receive side. I suppose it’s because there are so many electronic gadgets in modern vehicles that generate RFI…
Great read!
Getting ready to install Tarheel II and 857d into my Chevy pickup and this was exactly the info I needed thank you!
Ray. Did you ever get your radio installed? I’m looking for ideas for my 2019 C2500. Thank you. KC5VTL
Yes. It’s been operational for years now. Good luck!
Is there any way you could show how the head mount is mounted? I have a 2019 High Country with the same console and radio so I’m looking for help mounting the head unit. Thank you! KC5VTL
Yes. I will add that to the end of the post. Just saw this comment… better late than never I suppose!
Great article. I an looking to do something like this in my 2016 Lexus ES 350. I plan to use a Diamond lip mount. My trunk is not grounded to the chassis so I will need a grouning strap. What do you think of the Icon IC 7100? (The Yeseau front plate may be a bit small for my eyesight). Where did you get the swivel? Are you operating VHF and if so, what antenna are you using?
Could you share the part numbers for the Tories and the jumper length used to make the CMC choke. Thanks
Fair-Rite p/n 5943003801 (a ring-shaped toroid of mix 43, 2.400″ o.d., 1.400″ i.d.,
0.500″ tall / thick)
https://www.fair-rite.com/product-category/inductive-components/toroids/
See the link to the article in the blog post for more details.
Great read. I’m in the process of installing a Yaesu 856D in my Toyota Tacoma. Will be mounting the rig under the driver’s seat and the head unit in a center console I’m building. I already have the CMC’s installed on the control lines and co-ax cables. All it need to finish is the bonding, and your picture gave me a good idea hiwt to do it
Great read ty just the information I needed.
I wonder who posted this not the real KG5ILR.
Thank you for the great description and pics. Just what I was looking for. Planning to acquire a Yeasu FT857 and mobile it up with a Tarheel I already have and install it on my Highlander. Good info on the bonding needs. Love the homebrew choke. Ordering the toroids tonight!
I have a Tacoma as well & have been struggling with several constraints (plastic bed, home garage, parking garages, Katy / Houston vehicle burglary, etc.). All that aside, my question is how durable is the Little Tarheel when mounting without the C Shaped bracket that supports the upper section of the thin black metal tube antenna base? I have been avoiding the stud mount only setups like you have because I figured the wind loads would cause fatigue of the black section of the antenna. Seems like a pretty good moment built up at the base. Thoughts on that? KC5ZXO
I’m considering mounting a little tarheel II on my 2014 f150 with the shorty bed. Was there any particularly reason you chose the front driver side pocket vice passenger side.
I think it was just more convenient for running the wiring as I recall. It could’ve been placed on either side.
qaxwq6